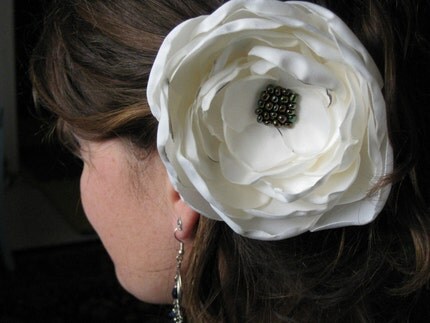
I have always loved the look of these flowers and knew I could totally recreate them. So today I took a trip to the fabric store to pick up the supplies I needed to make them. Here are the supplies you'll need.
Supplies:
Yardage of Satin Material (if you're only making 1 large flower 1/4 of a yard is more than sufficient.)
Yardage of corresponding Organza Material
Thread in corresponding colors
Needles
Glass Beads in corresponding colors
Scissors
Long necked lighter
Wine glass
Votive cup
Colored Pencil or Sharpie
Bottle of Wine for sipping as you craft!
Where to Begin:
Lay fabric upside down on your crafting surface. The silkiest side of the fabric should be face down.
Use the dimensions of a wine glass to trace a circle shape on the back of the fabric.
Trace several circles to make numerous flowers.
Cut the circles out with a pair of regular scissors.
Use a votive holder to make smaller circles and repeat the cutting process. Don’t worry about making the circles perfect.
Cut one large and one small circle about 1/4” smaller than the others.
You will end up with 4 circles this like this:
Begin the heat setting process by squeezing the largest circle together in your fingers.
Use your long necked lighter to slowly heat set the edges of the circle. The heat will cause the sides to curl and warp.
Continue the heat setting process with all of the circles.
Once all of the circles are completed, thread your needle with a corresponding thread. You’ll only need about 12 inches of thread doubled over. Knot the thread at the bottom.
Layer the smallest circle on top of the next largest circle.
Thread the needle up through the bottom of the two layered circles.
Before threading back down pick up a bead with your needle.
Thread back down into the center of the flower with your needle. Repeat as many times as you’d like based on the number of beads you’d like in the center of the flower. For these flowers I used 3 beads.
Once the beads are attached. Layer the remaining two circles with the largest on the outside. Use the same thread to attach these two layers to the inside section of the flower.
Gather the flower by creating an exaggerated X on the backside of the flower. When you pull the loose X in to tie it off it will gather and bunch the flower to create a beautiful bloom.
Use the blooms to attach to a hair pin, a belted sash, a necklace, or fashion a bouquet with these beautiful blooms.
A Few Added Tips:
For the white flower I also used a sheer organza fabric to create the beautiful airy look. Heat set the organza just like the satin. But be careful because the organza will brown much faster.
Using larger circles will create larger blooms but you’ll need more varied size layers in between to create a full look.
It does happen on occasion that heat setting can cause the fabric to catch on fire. In that case, quickly blow it out. Trim the dark edge off and start again.
If after you’ve assembled the flower there’s a little fraying… slowly, and carefully re-heat set.
Keep your eyes open for the DIY tips on turning these beauties into a bouquet!
Hope you enjoyed! Happy Crafting!


